Layouts
In this tab you can configure the shop texts that are shown to the visitors and personalize the way Articles and Categories are laid out.
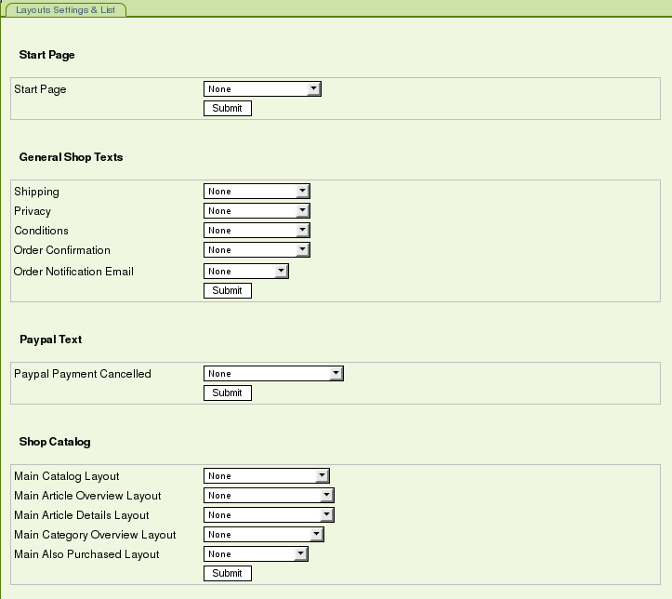
The Layout list, shown above, allows us to assign the personalized layouts that we will create.
Right now, we have not created - nor assigned - any, still the visitors can already browse and use the shop, thanks to Default Layouts.
Default Layouts are automatically used to display the shop when there is no layout assigned. As we will see later, the Default Layouts can also be used as examples for your own layouts, unless you prefer to create them from scratch.
Table of Contents
1. Start Page
2. General Shop Texts
3. Paypal Text
4. Shop Catalog
4.1 Article Display Settings
4.2 Category Display Settings
4.3 Also Purchased
4.4 Customize Catalog Layout
5. Article view
6. Category view
7. Also Purchased
8. Assigning a Catalog Layout to a Category
1. Start Page
Let's create our own Start Page to welcome our customers. Just type in a Layout Name, select "Start Page" as the Layout Type and press "Add".

The newly created Layout appears in the Customize Layouts List:

Now click on the "Edit" button in the "Action" column. This will load the Layout Details page:

The following items are displayed for all the layouts:
- Layout Name: Here you can change the Layout Name (this will only be shown to the shop admin) - Layout Description : You may type here a description (this will only be shown to the shop admin) - Layout Type : This uneditable field displays the current layout's type - Revert To Example : This button loads the Default Layout so that you may use it as a basis for your work |
After the separator are shown the configuration settings that are specific to the current Layout type. For instance, the settings for a Start Page are:
- Number of categories per row : If the "Category List" Element (see below) is present in the Layout, this parameter is used. - Category List Layout : Allows you to use a specific Category List layout for the Start Page |
To enter the welcome text itself, you may use the WYSIWYG editor:
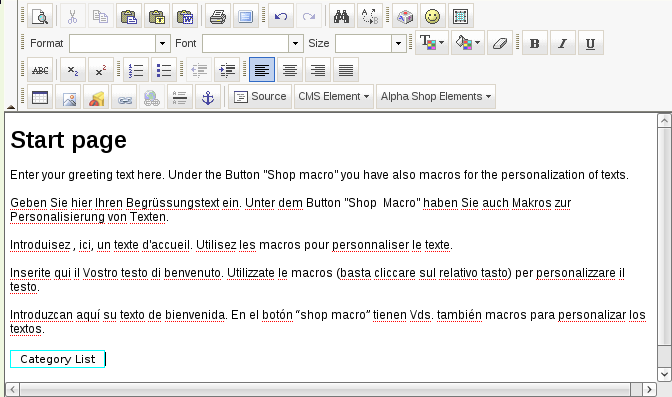
To insert the Category List, just place your text cursor where wanted, open the "Shop Elements" menu and click "Category List". The Element appears in the Preview. It will be automatically generated on the front-end where indicated.
Shop Elements are right-clickable in the WYSIWYG. This way you can access element-specific properties.
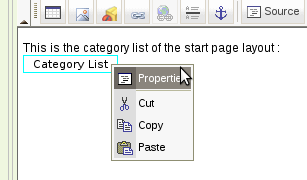
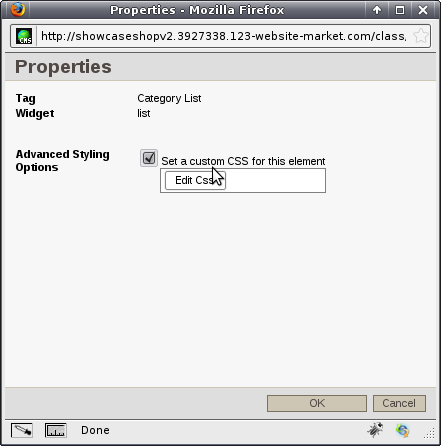
For instance, you can set up a specific CSS for the element:
When finished, click the "Submit" button at the bottom of the page. Then go back to the "Layouts Settings & List" tab and assign your customized layout to the Start Page:

Do not forget to click "Submit" button here to acually do the layout assignment.
2. General Shop Texts
Exercise: Following the same logic, create and assign the following General Shop Texts with specific information related to your shop:
- Shipping : Information about Shipping Costs and Conditions - Privacy : Privacy statement - Conditions : Terms and conditions - Order Confirmation : This text will be displayed to the customer when an Order has been successfully confirmed - Order Notification Email : The layout of the e-mail that is sent to both the Customer and the Shop Owner when an Order has been successfully confirmed |
Do not forget to select the right Layout Type when creating the layouts:

3. Paypal Text
When the Paypal Payment Method is enabled (see Billing Management), this Text is displayed when the Paypal payment procedure has been cancelled by the customer. You may insert the Shop Element "Try Paypal Again..." to provide a link back to tthe Paypal payment website.
4. Shop Catalog
Let's now create our own Shop Catalog Layout. It will be used to display the Articles and Categories as customers browse the shop. The available settings are:
4.1 Article Display Settings
Display Article List : If set, all Articles that belong to the current category will be displayed.
Number of articles per row : Self-explanatory
Number of articles per page : If set to "Default", the value set of the Display Settings will be used.
                              If set to "Custom", you may enter a specific number of articles per page for this Layout.
Article list layout : You may choose the Layout that will be used to render Article Overviews (i.e. in Article Lists), here.
Article detail layout : You may specify the Layout that will be used to render Article Details, here.
|
4.2 Category Display Settings
Display Category List : If set, subcategories that belong to the current category will be displayed. Number of categories per row : Self-explanatory Category List Layout : You may specify here the Layout that will be used to render Category Overviews. |
4.3 Also Purchased
Also Purchased Article List Layout :  You may choose here the Layout that will be used to render Articles
                                      in the Also Purchased Articles List)
Number of also purchased articles per row : Self-explanatory
|
4.4 Customize Catalog Layout
By default, this setting is unchecked. That means the Default Layout will be used. If you want to customize it further, like for instance add your own texts, change the background color, etc... you can enable this setting. This allows you to edit the Catalog Layout using the WYSIWYG editor. The available Shop Elements are:
- Category Name - Category Image - Category Description - Article List - Category List |
When done, press "Submit" and assign the newly created layout as the "Main Catalog Layout". This means it will be used to render all the Categories of your Shop.
NOTE : The Number of Articles per Row in the Start Page is read from the Main Catalog Layout's setting.
5. Article View
This type of Layout is used to render either Article Overviews (i.e. in Articles List) or Article Details.
In the Layout Details page, you have access to one example for each case:

The Shop Elements available for the Article View Layouts are:
- Article Nr | - Article Title | - Article Short Description | Directly read from the current Article's Details - Article Long Description | - Article Price | - Article Extra Info | - Article Image : The full-sized Article's Default Image - Article Thumbnail : A more flexible Image element allowing to set Image Options in the Element Properties - Article Option Selector : Allows the customer to choose between the available Article Options (i.e. Size=XL, Color=Blue) - More... : A link to the Article Details - Add To Cart : Self-explanatory - Also Purchased : The list of Articles which were previously purchased along with the current Article - Back : A link to the previous page visited |
6. Category View
This type of Layout defines how each (sub-) Category will be rendered. here you can use these two Shop Elements to create the Layout:
- Category Image
- Category Name
7. Also Purchased
This Layout defines how each Article in the Also Purchased List is rendered. The available Elements are mostly the same as in Article View layouts, minus:
- Article Option Selector
- Add To Cart
- Also Purchased
- Back
There have been taken out to preserve readability of the Also Purchased List.
Exercise: Let's make the "Lovely Gifts" Category look totally different from the rest of the Shop. To achieve that, create another set of Shop Catalog Layouts, i.e.:
- Article Overview Layout
- Article Details Layout
- Category Overview Layout
- Also Purchased Layout
- Catalog Layout (that uses the above layouts for rendering)
8. Assigning a Catalog Layout to a Category
The assignment of a Catalog Layout to a Category is achieved in the Categories List:

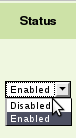
Make sure the Category you want to customize is Enabled using the drop-down menu in the "Status" column:
Then, we'll assign to the "Precious Gifts" Category, the "Precious Gifts Catalog Layout" that we created in a previous exercise. Click on the drop-down list in the "Layout" column, and select the chosen Catalog Layout.

Note: "The Writing Stuff" Category has no layout assigned, that means that the system will render it using the Main Catalog Layout, as defined in the Layout settings.